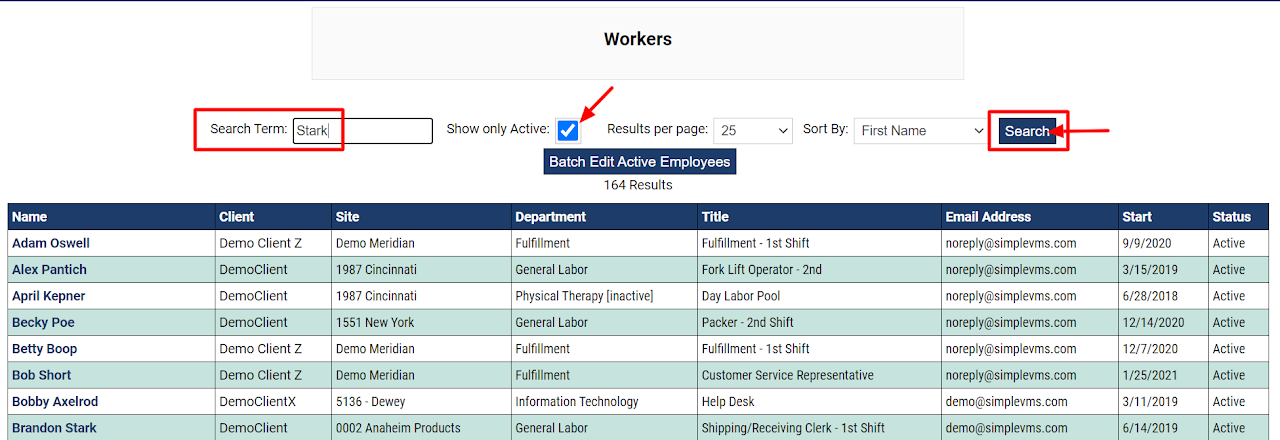
To create a timesheet for your worker, from the 'Workers' tab search for or select the name of worker you need to create a timesheet for within the system.
To locate the worker:
-
Type a few letters of the first or last name.
-
Uncheck the 'Show only Active' box if the worker you are wanting to view is no longer on assignment.
-
Select 'Search' and then select the name of the worker you wish to view to open their worker profile.
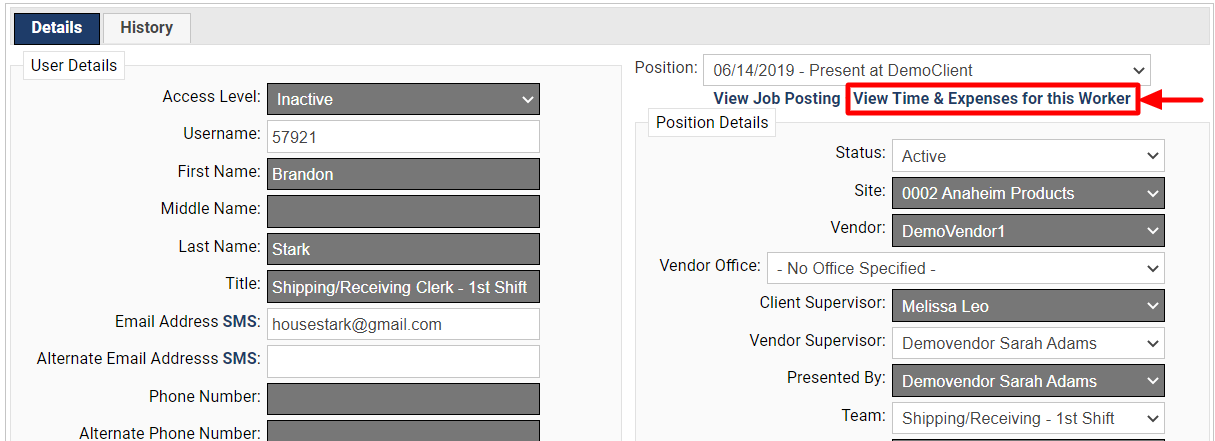
When the worker profile opens up, select the hyperlink 'View Time & Expenses for this Worker'.
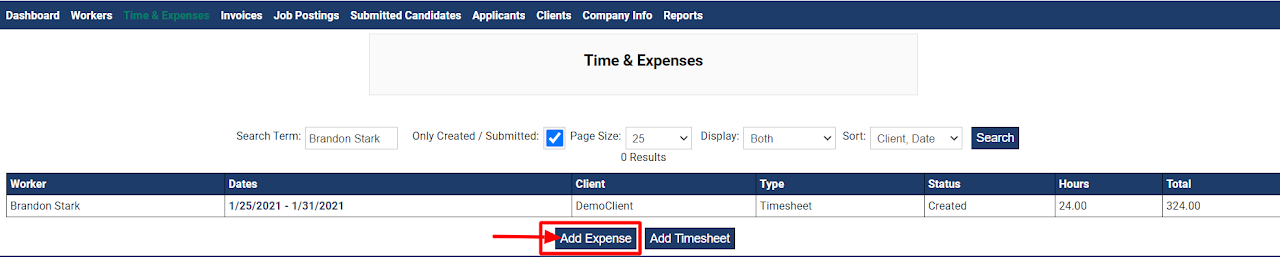
When this hyperlink is selected the system will open the Time & Expenses tab and showcase to you the 'created/submitted' timesheets and/or expenses for the worker. If you wish to view approved or rejected timesheets/expenses as well you will need to uncheck the 'Only Created/Submitted' checkbox found at the top of the page.
To add a timesheet, select 'Add Expense'.
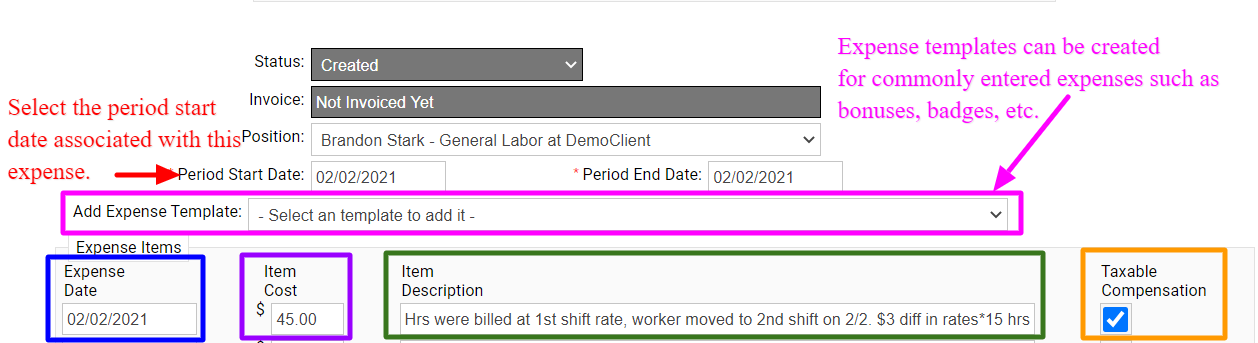
Period Start Date: Enter the period start date for the work week associated with the expense needing to be entered.
Expense Templates: From the dropdown menu you can select the expense template needed for this expense. Templates are created by the client for commonly entered expenses for your workers. Expense templates can be created to apply your mark-up percentage to the expense should it be applied. They can also be created to credit money back to organization for lost goods such as badges, equipment, etc. that is assigned to workers. If an expense template is used the below fields will auto populate based on the parameters of the template.
Expense Date: Enter in the date associated with this expense.
Item Cost: Enter in the amount of the expense. Expenses can be created to further bill the client or to credit money back to the client should they have been overbilled. If you are entering in an expense credit, simply enter in a - in front of your dollar amount. This will be credit on the invoice sent to your client once approved.
Item Description: Enter in the details for the expense. It is recommended to be as detailed as possible when creating expenses. The goal is to provide enough information so that anyone, even managers not associated with the worker, can view the expense and know what/why it was entered.
Taxable Compensation: If taxable compensation is checked this item is considered to be compensation related and taxes should be applied. If this expense is considered a 'pass through' expense such as reimbursement for items already taxed, uncheck this box when entering your expense. By default this box will be checked within the system.
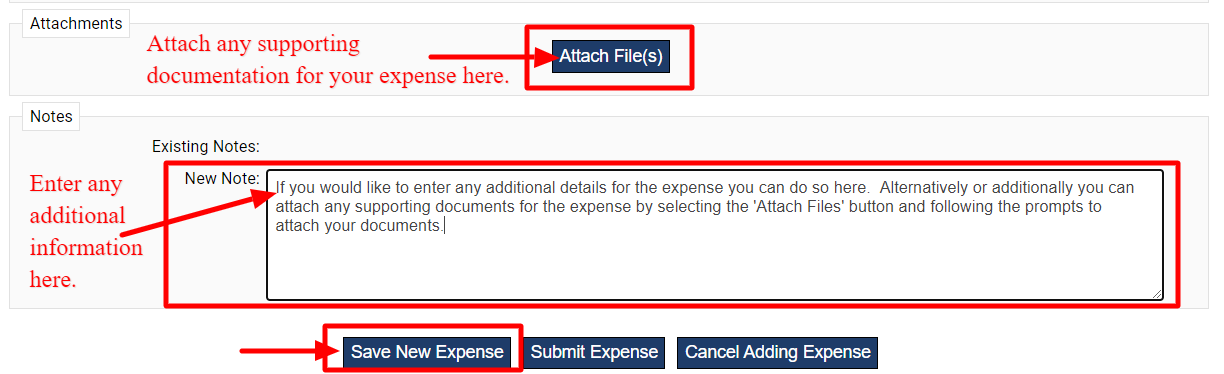
Scroll to the bottom of the expense to attach any files you may want to associate with this expense or add any notes you may want to document for this expense.
At the very bottom of the page select either 'Save New Expense' or 'Submit Expense'. If you select 'Save' you will still be able to make changes to this expense if needed. If you select 'Submit' you will not be able to make any changes to the expense. Saved or submitted expenses will both be visible to the client to review and approve. Once approved the expense will be on the next invoice the system generates.